LCD Screen
Now that you’ve wired up the servo and joystick, you’re ready for an even bigger challenge, the liquid-crystal display (LCD). You can draw words, pictures, or even a game screen using this display!

Wiring
For this exercise we won’t be walking you through the wiring. This is preparation for the hackathon tomorrow and the rest of your DIY career! Feel free to ask mentors for help and reference the internet.
You’ll need the LCD, many wires, and a potentiometer. A potentiometer is a knob that changes resistance when you turn it. It’s use to adjust the contrast of the screen.
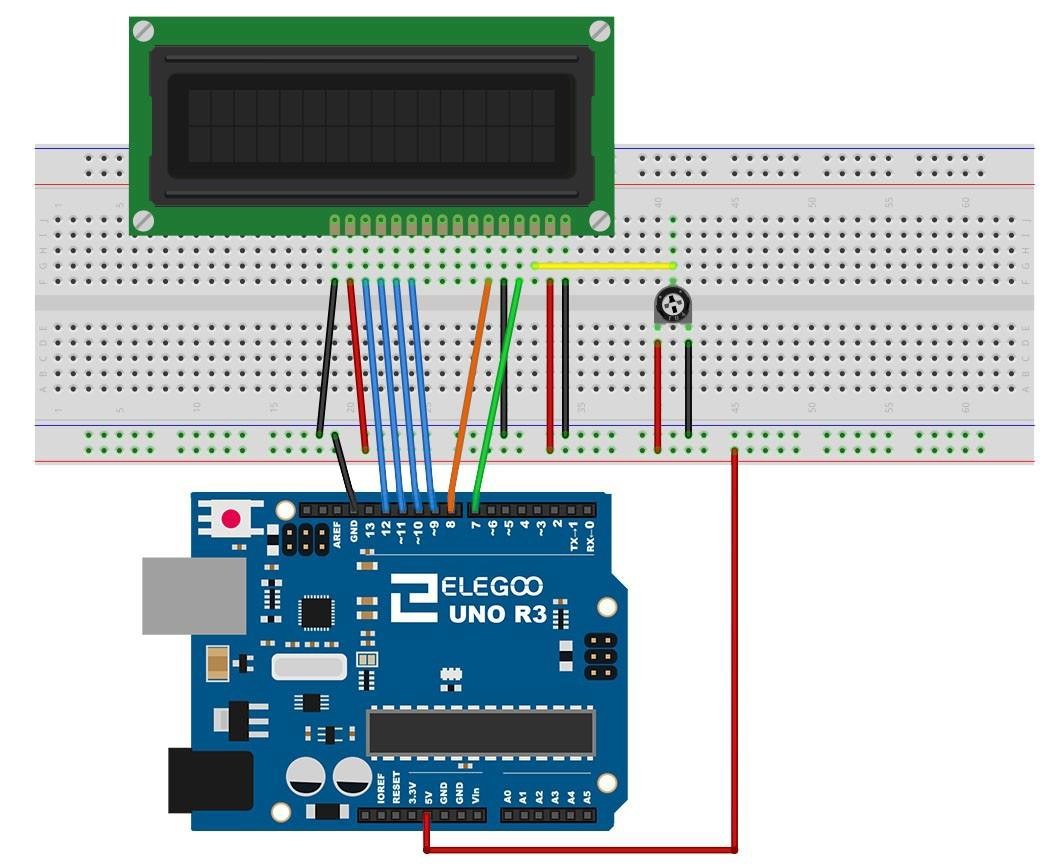
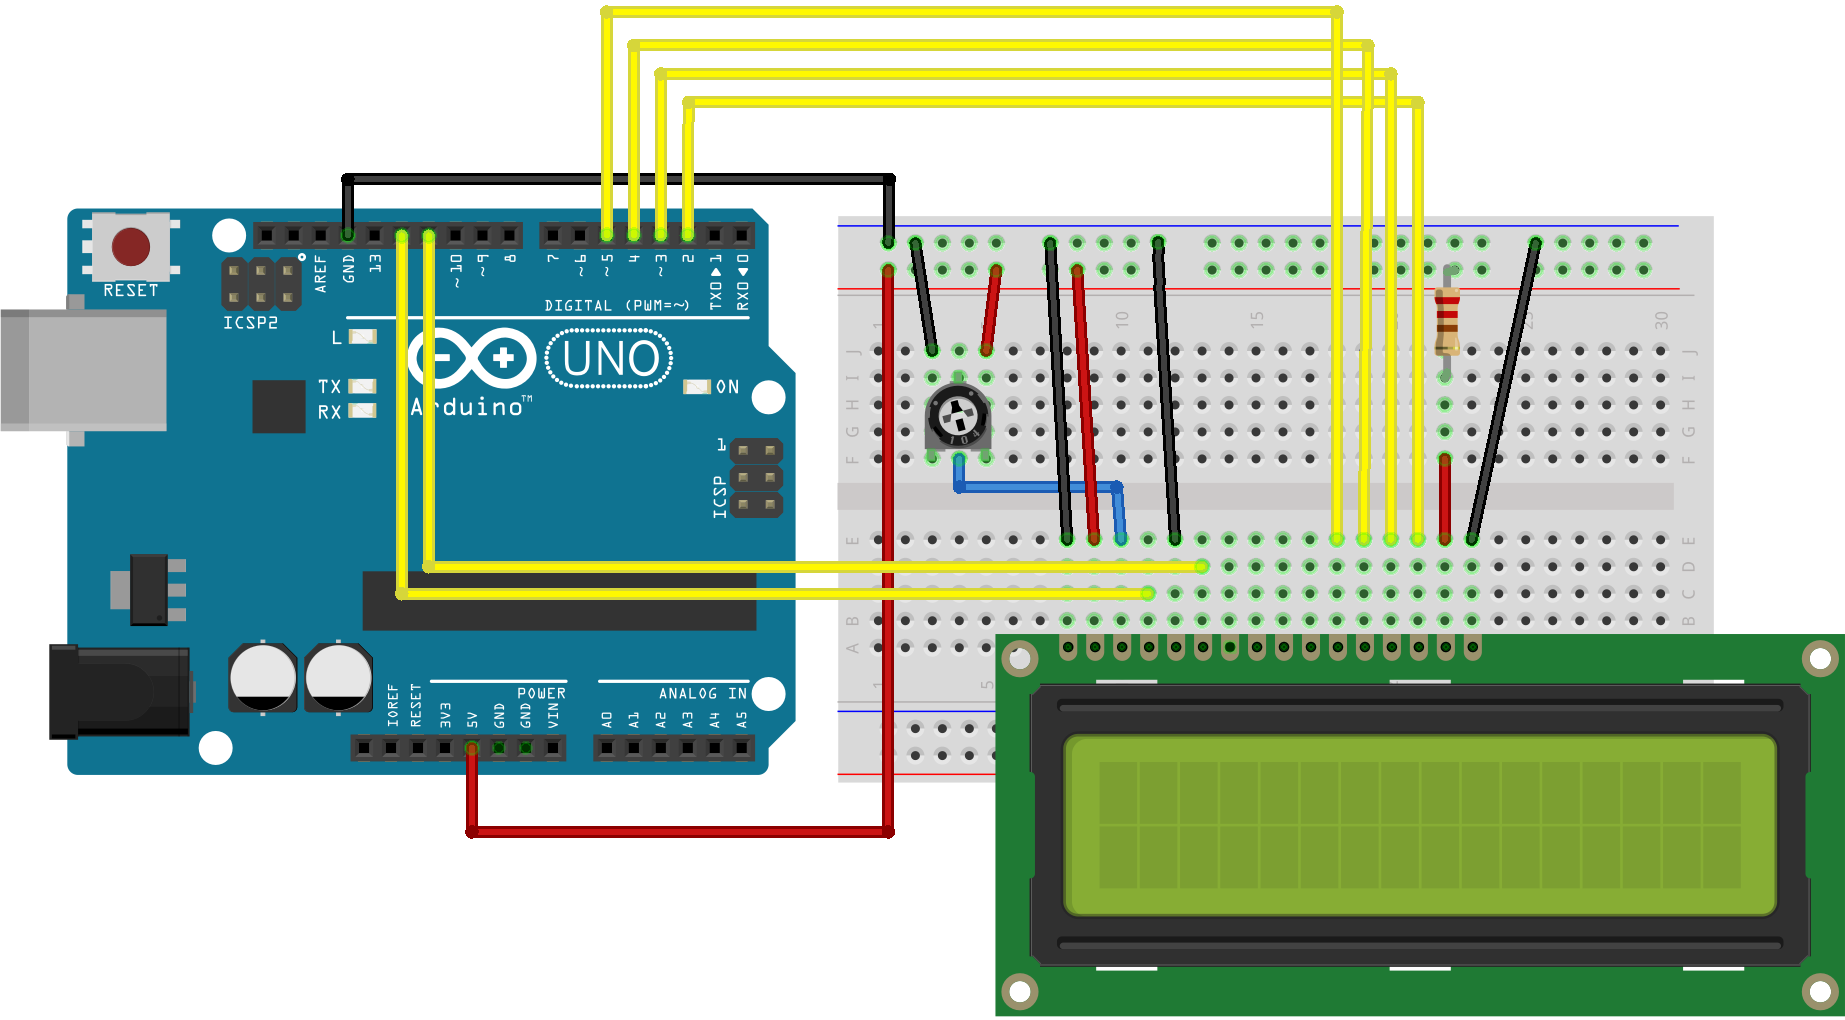
Here are two example wiring diagrams for the LCD. Some wiring in the diagrams may conflict with things you’ve wired up earlier, so you can either take things apart or use different pins.
LCD Wiring Example 1
LCD Wiring Example 2
Coding
The LCD is controlled by the LiquidCrystal library. To confirm
that you’ve wired the LCD correctly, first upload the HelloWorld
example from File > Examples > LiquidCrystal > HelloWorld.

Once you’ve got HelloWorld working, you’re all set! Read through the
library documentation and examples to make something fun. You can also
download a fun example we made to control a ball on the LCD using the
joystick.
Bonus exercise 1: Use the joystick or button(s) to type something out on the LCD.
Bonus exercise 2: Make a game using the joystick or button(s) and the LCD.
Wrap up
And that’s the end of workshop 3! In the next workshop you can build anything you want for the hour using the hardware in your kit. Take advantage of this time to brainstorm project ideas!
Some ideas:
- Theremin (buzzer, photoresistor)
- Bop-it game (buttons, potentiometer, tilt switch, etc.)
- Burglar alarm (ultrasonic sensor, buzzer, LEDs)
< Previous: Servo and Joystick · Next: Open-Ended Project >
This content is licensed under CC BY-NC-SA.