Overview of the Board
Next, let’s open our kits and take a look at what’s inside! We’re using the Elegoo Uno Super Starter Kit. While you’re opening the kits mentors will come around and cut open the zipties holding the wires in the kits.
From the box, first take out the Elegoo Uno R3 board. We’ll colloquially call this the “Arduino”. This board is like a mini computer we can program to do cool stuff.

Hold up the Arduino if you’ve found it in the box!
Let’s notice a few things on this board.
Microcontroller IC
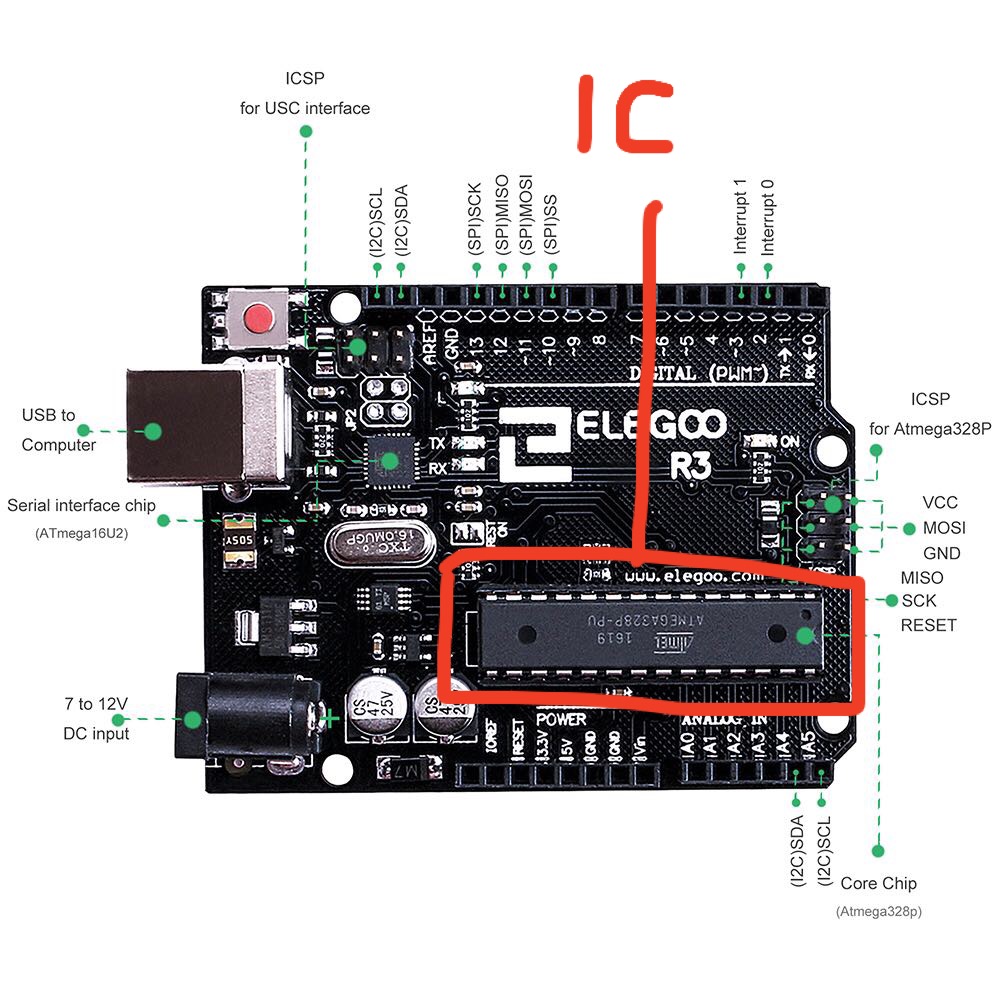
The IC (integrated circuit) is the main “brains” of the board. When we upload code, we upload it to this chip. Everything else on the board is various peripherals related to input and output.
Pins
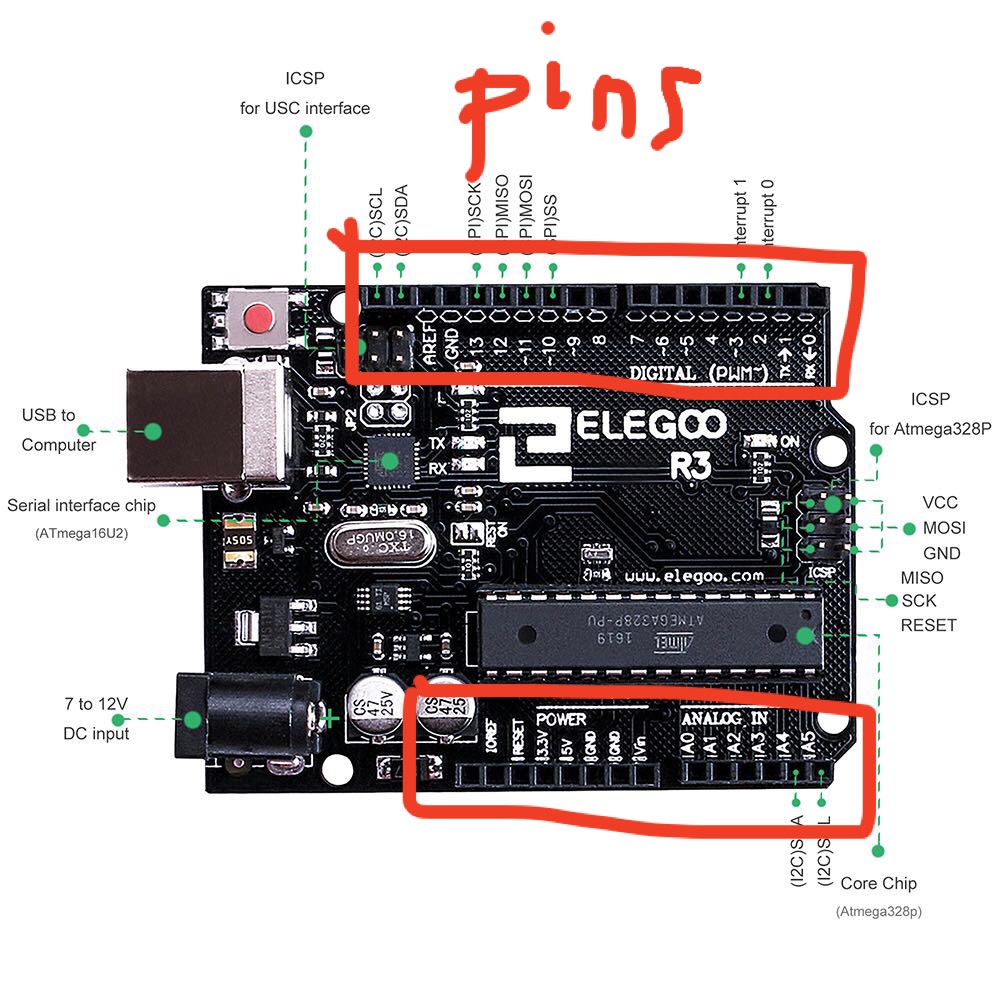
The pins on the board allow it to interact with the world. The pins can serve different purposes, from general purpose input-output (GPIO) to various communication protocols like I2C.
USB Port
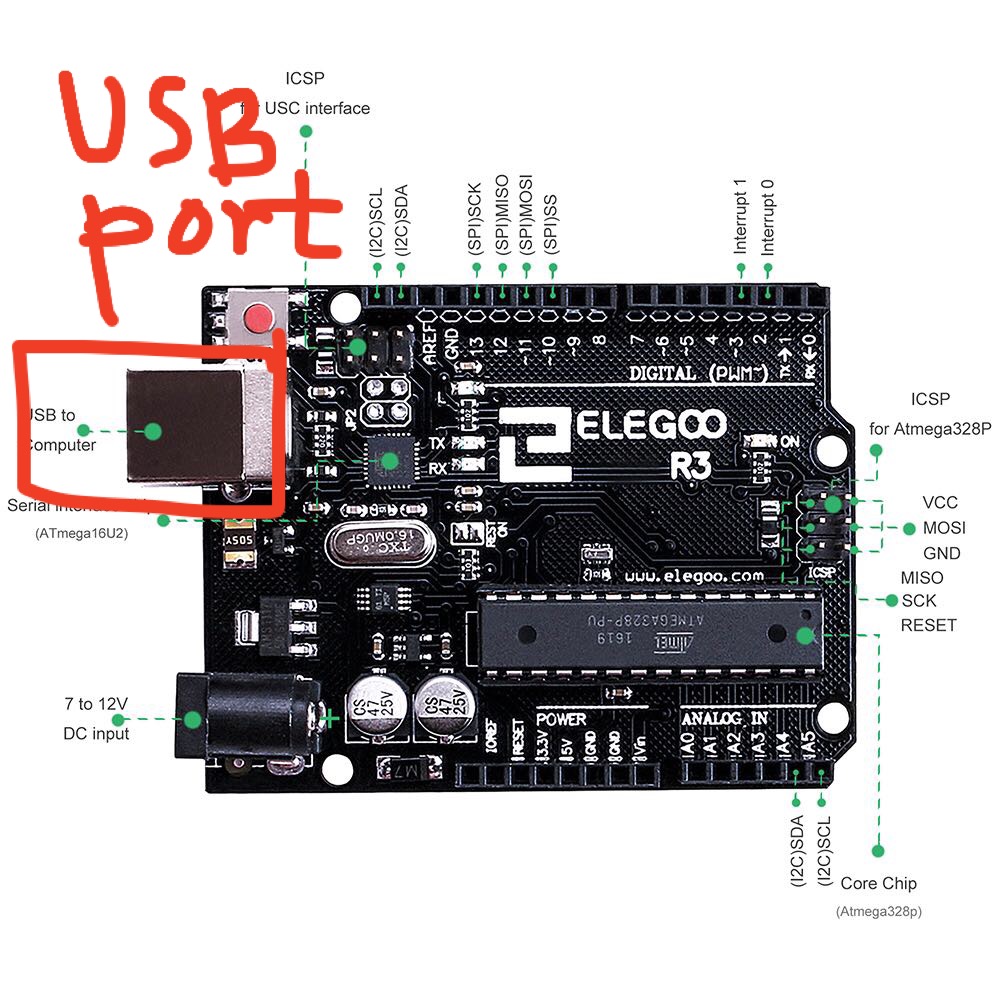
The USB port lets us program the board and send and receive debugging messages from it.
Reset button
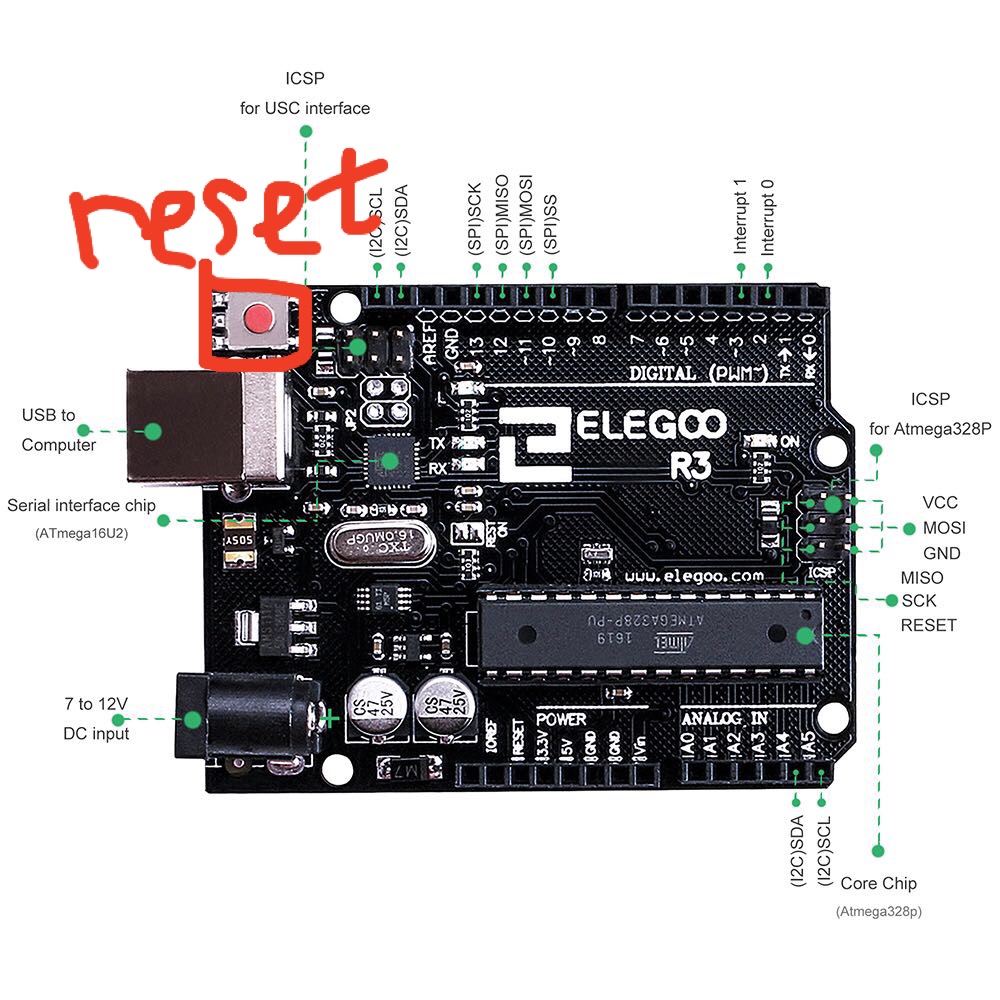
If you press the reset button, the Arduino will restart its execution from the beginning of the program you uploaded. This can be helpful for debugging.
Built-in LED
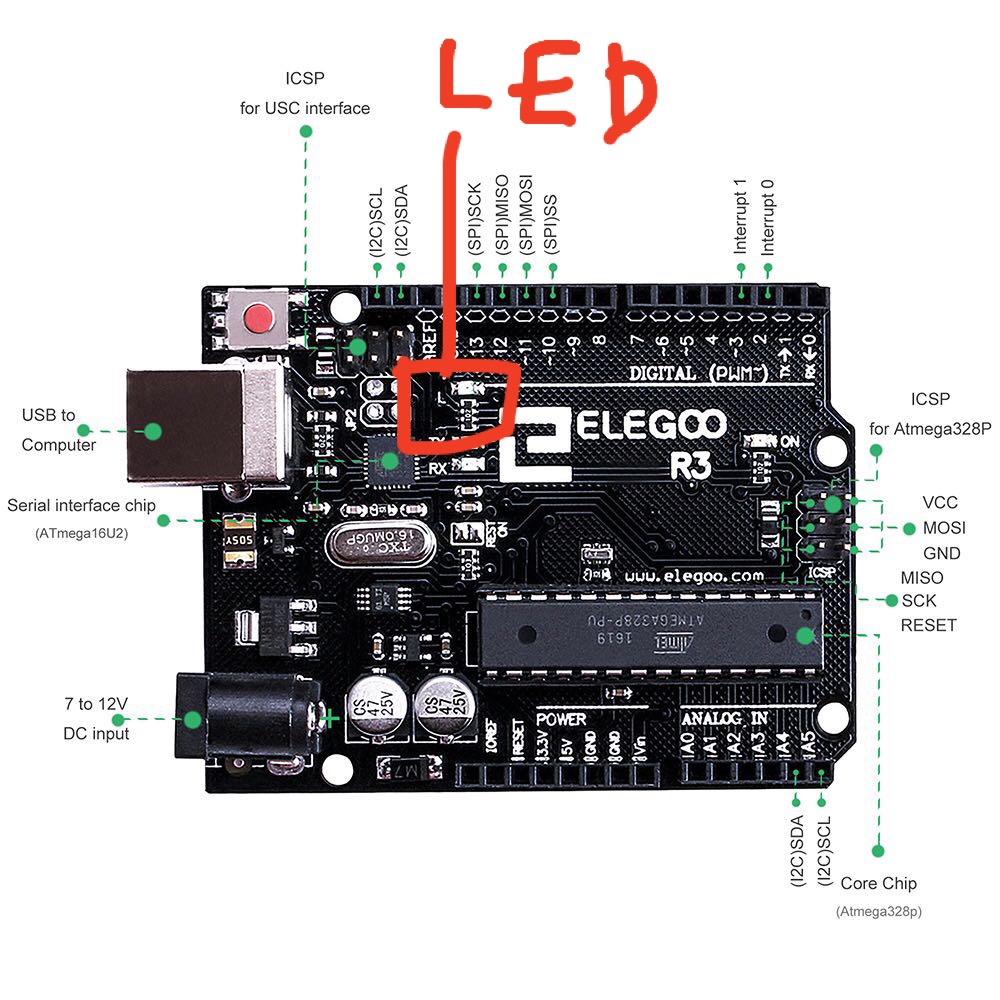
This board comes with a small LED (light) embedded in the board. It’s kind of hard to see, but it’s marked by an “L” on the silkscreen. As our first task, we’ll program this LED to blink on and off!
< Previous: Welcome and Setup · Next: Blinking LEDs >
This content is licensed under CC BY-NC-SA.